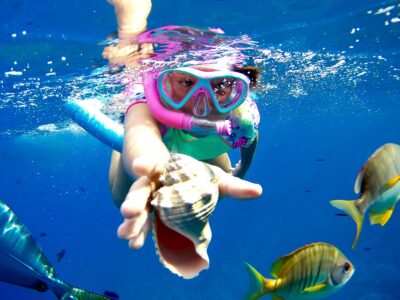
The memories I’ve made snorkeling have been some of my favorites in all of my travels; gliding through Bonaire’s national marine parks with curious sea turtles, exploring unspoiled coral reefs as far as the eye could see in Indonesia, swimming alongside colossal whale sharks in Mexico, and tons more.
It took some time to build up the confidence to be able to do some of these things, but it was so worthwhile because if I was scared of snorkeling, I would have missed out; either because I didn’t get in the water at all, or because I was so concerned about the process that I would have missed what’s right in front of me.
Snorkeling, when done well, can be a safe and easy way to explore the magic of the ocean and experience a world so different to the one we’re used to. But, if you’re new, it might be tough to figure out where to start. So, let’s walk through 12 easy ways to move beyond being scared of snorkeling and instead get started confidently.
1. Check in With Your Swimming Ability
Since the majority of what you’re actually doing while snorkeling is swimming, it makes sense to check in with where your swimming ability is at right now. That doesn’t mean that if you aren’t a super strong swimmer, you won’t be able to snorkel. But, knowing your ability will give you an idea of where to proceed from here.
Salt water does help to buoy you a bit more than fresh water [source], which is a helpful boost, but be honest with yourself. Are you able to comfortably swim around for an extended period of time in the ocean without any sort of protective gear (snorkel mask, life jacket, etc.) without any concern that you won’t be able to make it back to shore? If so, nice work! You’ll be able to get started with snorkeling pretty easily.
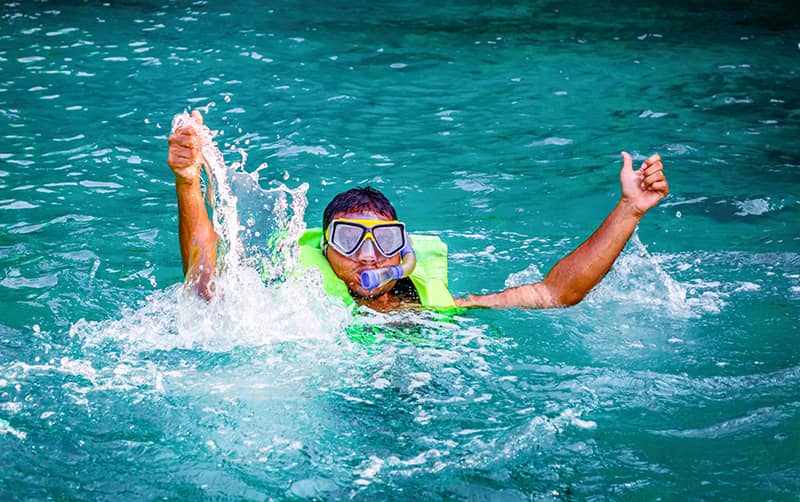
If the above doesn’t necessarily sound like you, that’s OK. In this case, I would recommend picking up a life jacket for snorkeling like the O’Neill Superlite Men’s Life Vest (over at Amazon) or O’Neill Superlite Women’s Life Vest (Amazon) if you want a lot of flotation, or the Seaview Palawan Snorkel Vest (Amazon) if you just need a little boost. It might sound a little goofy, but it’s fairly common and actually sometimes a requirement for snorkel tours in some parts of the world (like Mexico).
Wearing a life jacket gives you the ability to float easily without worrying about needing to constantly keep yourself above water. And, if there’s any sort of problem (like if your mask gets some water in it), it’s easy to just sit upright and take care of the problem above the water. It goes a long way towards comfort and security when you’re just starting out.
[For more detailed info on snorkel vests, life jackets, and the like, check out The 3 Best Snorkel Vests, Life Jackets and Flotation for Snorkeling (Adults & Kids)]
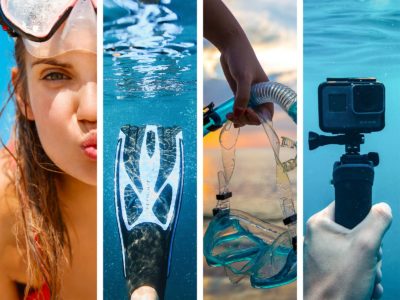
2. Get the Right Snorkeling Equipment
There’s definitely a difference in the type of snorkel equipment meant for beginners or more advanced snorkelers, so you will want to make sure that you get the right tools for the job, so to speak.
Snorkel Masks

Regarding the snorkel mask itself (the big goggles that cover at least your eyes and nose), the most important consideration to make right off the bat is how it fits. Does it fit your face well? Does it feel snug without being uncomfortable? And, most importantly, does it keep water out? Every mask and every face is different, so you may want to try out what options you can find before committing. A dry mask makes for a happy snorkeler.
To help you get started finding a mask, check out our in-depth guide on what to look for in snorkel masks along with average prices and our recommendations.
Snorkel Tubes
Next, you’ll need to add a snorkel (the tube that you hold onto with your mouth and which sticks up above the waterline to allow you to breathe in fresh air as you swim), and we always recommend what’s known as a “dry snorkel” for beginners.

Dry snorkels look very much like a traditional snorkel with a mouthpiece connected to a tube, but the dry snorkel variety has a one-way valve on top of the breathing tube that aims to keep out any unexpected seawater while allowing you to breathe in normally. They really do help a lot, and that added security grants extra peace of mind for new snorkelers.
We like dry snorkels so much that we wrote a whole article on them, The Best Dry Top Snorkel This Year: A Clear Winner, and there we go into more detail on your best bets when choosing a dry snorkel, so check that one out before committing to a snorkel tube.
Fins
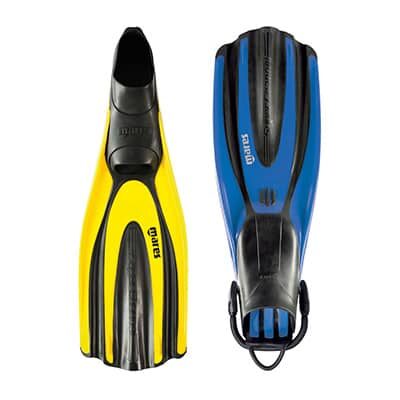
Adding fins to your snorkel gear can be hugely helpful for a beginner. They can be a little awkward to learn how to navigate on land, but once you’re in the water, they make a big difference. You’re able to move farther and faster which helps you to cover more area and feel more confident in your swimming ability.
You can get a good gauge on picking out the right fins over at The Best Snorkel Fins for Beginners, Advanced Snorkelers & Travelers.
Rental Snorkel Equipment
Renting snorkel equipment can be a good idea if you aren’t yet sure that you want to continue with snorkeling. You can usually get started for a day for about $10 instead of $40-60 to pick up a good basic mask and dry snorkel of your own (if you see yourself snorkeling more than a couple of times, though, we definitely recommend your own set).
Dive shops will typically be your best bet to rent snorkel equipment since they will have a lot more quality inventory over something like a beach-side stand, and should also be able to set you up with a dry snorkel (which isn’t usually considered standard snorkel equipment at dive shops). Most dive shops will also have life jackets to rent, so you can pick everything up in one place.
If you’re headed out on a snorkeling tour with an established tour operator, chances are that they will have snorkel equipment for you to use which is already included in the cost that you paid for the tour. We generally don’t recommend this equipment, however, since these options tend to be lower-quality masks and traditional open-top snorkel tubes which aren’t always best for beginners.
You can always contact your tour operator ahead of time and ask, but if they don’t have what you’re looking for, it’s well worth a few bucks to rent quality equipment that will help you feel more comfortable in the water.
3. Understand Your Snorkeling Equipment
Understanding how your snorkeling equipment works and fits together is essential to make sure that you have an enjoyable, worry-free time in the water.
Fortunately, snorkel equipment is way simpler than equipment for something like scuba diving, so a few minutes spent with your mask and snorkel before testing them out will go a long way.
The first piece that you want to familiarize yourself is your mask, and most specifically, the strap. You want to shoot for a fit that is plenty snug without being uncomfortable, and chances are some adjustments need to be made.
Some masks have a ribbed silicone strap that kind of pulls through a buckle on each side to adjust its length behind your head, while some better masks will have a small button on each side of the mask that depresses to allow the strap to move back and forth and adjust the fit. In any case, spend a couple of minutes playing with the adjustment and trying your mask on until it feels right.
Next, spend a couple of minutes with the snorkel tube itself. Very old snorkels didn’t have much to them, and were essentially just a free-floating tube that you held in your mouth. But, newer snorkels have some extra niceties that you’ll want to pay attention to.
Instead of being free-floating, your snorkel tube will likely have a clip that connects to the strap on your mask to keep it fixed to the side of your head, which is nice so that you don’t need to worry about losing it or it flopping around uncomfortably. It’s adjustable, so you can move the snorkel up or down depending on what fits your face. Spend a little time adjusting the snorkel so that the mouthpiece fits comfortably in your mouth while the tube sticks up in the air when your face is pointed downward.
Making these adjustments beforehand eliminates the need to have to try to make these on the beach, in the boat, or even in the water.
4. Prepare Your Snorkeling Equipment Correctly
Snorkel masks benefit from just a little bit of prep work, primarily to keep the mask surface clean in a special way that repels fog, which is a common issue with snorkel or scuba masks that can really put a damper on your experience.
You can easily clean and coat your snorkel mask with a couple of common household items, but we won’t spend too much time on the exact process now since we’ve already written out a helpful guide on cleaning and anti-fogging your snorkel mask that you can reference separately.
5. Understand the Ocean Conditions
Now it’s time to look at getting into the water! This is exciting, but may still feel a bit uncomfortable if this is one of your first times around snorkeling.
An easy place to start is just to educate yourself on checking ocean conditions, and the easiest way to go about this is with beach flags. Typically, at most beach-side hotels or public beaches in many places around the world, you’ll find a small flag pole with various colored flags raised during the day depending on the ocean conditions.
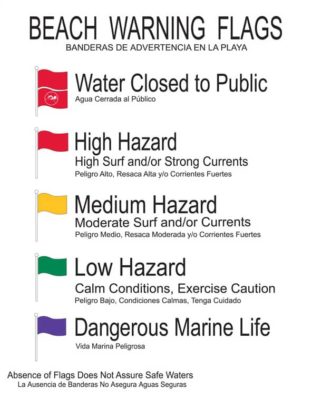
As a beginner, you’re typically going to want to wait for a green flag, just to give you that extra calm while learning.
If no flags are present, that doesn’t necessarily guarantee calm waters. In this case, it’s a good idea to ask someone nearby like a lifeguard or dive shop owner, or even look it up online as many areas keep this kind of information updated throughout the day.
6. Talk to Locals About Snorkeling
Next, it’s always a wonderful idea to talk to locals about snorkeling in the area. Often times, they’ll be able to provide information that you otherwise would have no idea about.
For example, maybe there’s an algae bloom happening that you want to steer clear of. Or, maybe it’s jellyfish season or there’s been a shark sighted nearby recently that people are generally waiting on to head back out to sea before people jump in the water again. Sometimes certain places (like Los Cabos in Mexico) are well-known for having gnarly currents and only a few certain areas are safe to swim.
Or, on the flip side, maybe they know great spots to see tons of fish or know what time of day the sea turtles show up (this was definitely the case in Curaçao — they liked to hang out at the fishing docks around 2pm). Information from locals can help you both to avoid trouble and also find new wonder.
If you’re staying at a hotel near the water, the hotel concierge or people at the front desk will be great resources for this type of information. You can also just head down to the beach and talk to people. Generally, most everyone is more than happy to share what they know.
7. Go for a Test Snorkel
Once you have your equipment all ready to go, it’s crucial to test it all out before you actually set out on your first real snorkel. Just head down to the beach with a buddy and put everything on before wading out to a spot that’s about waist deep.
(Hot tip: if you’re wearing fins, try to shuffle sideways or backwards into the water. If you try to walk into the water forward while wearing fins, you will definitely bellyflop. You can also carry your fins while wading out, then put them on once you get deep enough where you won’t have to walk in them.)
From here, you can just duck down into the water and see how everything feels. Practice breathing deeply and evenly and moving around a little. Does everything feel stable on your face? Are there any leaks? If there are any problems, you can easily just stand up and make any adjustments that you need without needing to worry about treading water or anything else.
Once everything is adjusted well and ready to go, you’ll have more confidence moving forward.

8. Practice What to do if There’s a Problem
Snorkeling, like anything in life, isn’t immune to issues. These issues typically boil down to two things: water in your mask, or water in your snorkel tube.
During your same test snorkel that we just talked about, move to a spot where you can move a bit and do some real swimming around (but not so far that you can’t just stand up again if you need to) with your mask in the water and breathing through your snorkel.
Try wiggling your mask around a bit to let a bit of water leak in (but don’t pull it off your face and let a bunch of water in because an eye full of salt water doesn’t feel awesome). As this happens, you can gauge how it feels, and figure out just how much water has to leak in before it’s causing problems for you. At that point, practice stopping swimming, treading water for a moment (or just leaning back and floating in a life jacket) and lifting up the bottom of your mask to let the water drain out before continuing on.
You can also let a bit of water into your snorkel tube, but be careful not to inhale it since salt water can cause serious breathing problems if you pull in too much of it. If you have a nicer snorkel (like the Oceanic Ultra-Dry 2 [Amazon] we recommend), you might have a purge valve built below your mouthpiece that will allow you to let out a puff of air to expel the water out the bottom of your snorkel.
If your snorkel doesn’t have a purge valve, practice leaning your head back a bit (but not so far that the snorkel tip touches the water) and forcefully blow air into your snorkel. This should shoot the water out of the top of your snorkel tube and leave you with a relatively dry airway.
Lastly, if your mask ends up getting foggy (this test snorkel that you’re doing will be a good indicator whether or not this might be a problem, and if you then need to further clean your mask), practice treading water/floating and pulling your mask off entirely. You can spit into the inside of your mask and rub it around the lens with your fingers (gross, I know, but it works fantastically) before briefly rinsing it and putting it back on.
If you practice these scenarios in a safe water situation, you’ll be a lot more confident that you can deal with them should they happen on an actual snorkel trip.
9. Stay Close to Shore
Once you’re ready to try snorkeling for real, stick close to shore. It sounds obvious, but by working outward from the beach little by little while still staying within a stone’s throw of the beach, you can gain confidence snorkeling in situations where your feet don’t touch the ground while still being just a few extra paddles back to a safe area.
If at any point you start to feel too uncomfortable, it’s totally OK to head back to the shallows and take a breather. Rome wasn’t built in a day, and gradually increasing your depth and distance — even in very small amounts — is a great way keep making progress toward a goal without overwhelming yourself.
10. Snorkel with an Experienced Buddy
Snorkeling is something that you should always do with someone else no matter what, and when you’re just starting out, make that someone else (or someones else) someone who has experience with snorkeling if you’re starting out solo.
For one, they’ll be able to keep an eye on you and help out if there are any problems (and you’ll be able to return that favor once you get more comfortable). For another, they’ll be able to answer any questions you might have on technique, gear, and whatever else might come up. It’s a great blend of safety and wisdom that will help you as you get more comfortable with snorkeling.
11. Take a Snorkeling Tour for Your First Time
Probably the best way to hit the ground (water?) running once you’ve made yourself comfortable with the basics is to take a guided snorkeling tour. Not only will guides be able to provide you an experienced snorkel buddy from our last tip, but they’ll be able to take you to places you wouldn’t otherwise be able to get to yourself which will let you experience more incredible parts of the ocean. And, the guides are heavily invested in making sure that you stay safe, so that’s an added confidence boost.
I usually start researching potential tours at Viator by entering my destination and narrowing down to snorkel tours. Viator is a great resource for tour research because they’ll often have a lot of operators listed, and you can read customer reviews for each one to make sure that it sounds like something you’re into. Of the many tours I’ve booked through Viator, 99% of the ones I’ve put a little time into researching turned out to be absolutely fantastic.
12. Clean Your Snorkel Equipment Afterwards

If you’ve invested in your own snorkel gear, you definitely want to clean your gear thoroughly. Otherwise, over time, the salt water will break down the components of your gear and you can lose water-tightness, anti-fog and general performance of the mask and snorkel.
We’ve written a thorough guide how to easily clean your snorkel mask, and another on cleaning your snorkel itself, so be sure to follow those steps after each session in the water to keep your gear in tip-top shape.
The Deep Dive
It’s not uncommon to be a bit scared of snorkeling if you’ve never done it before. But, by following the steps above, you should be able to build your confidence and ramp up to your first real snorkel trip.
(You may also want to digest more information, like our complete guide to snorkeling for beginners.)
Then, after you’ve completed your first snorkel trip, keep it up! Every successful snorkel helps you to build confidence and continues the amazing experiences along the way, so find opportunities to practice. Even if your practice just means swimming along the shore to practice your breathing or build your swimming ability so you can shed a life jacket, it’s going to be worth it once you build to open-water snorkeling with gliding manta rays or playful dolphins.
And, don’t forget to enjoy it! There’s so much to see along the way — make sure to stop and smell the roses coral.
Up Next
If you’re a beginning snorkeler, the following resources will also help you get started: