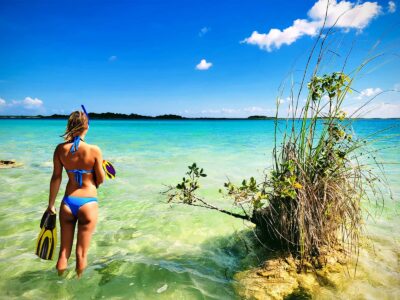
By far, the best decision I made after I got into snorkeling was to buy a waterproof action camera like a GoPro. For. Sure.
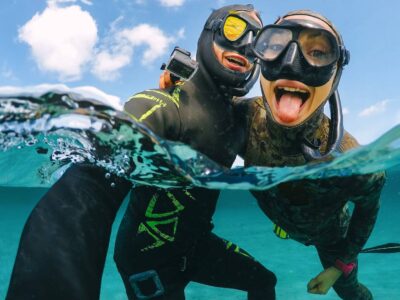
Snorkeling is an absolutely incredible experience on its own, but action cameras like a GoPro made that experience even more incredible by allowing me to watch myself glide alongside 35-foot whale sharks in 5K, post my views of breaching humpback whales on Instagram to share with our friends, print selfies from exotic water locations to hang on our walls, and plenty more. It’s been a blast, and I now get to hold onto those memories for a lifetime in a very real way.
But, learning how to use a GoPro for snorkeling took some time and a few mistakes along the way to really learn how to do it well after I bought my first action camera. Since then, I’ve spent hundreds of hours in the water capturing some pretty incredible memories and learning a lot as I experienced them. I wish I had someone to teach me the basics when I first started taking a GoPro snorkeling, so I’m going to share what I’ve learned here with you.
So, let’s take a look at 5 easy steps that will help you learn how to use a GoPro for snorkeling and quickly get in you in the water to capture your own life-long memories.
1. Choose Your Action Camera for Snorkeling
The first step, if you haven’t already, is going to be to choose your action camera.
You might already have one in-hand and just want to learn what to do with it, if that’s the case, it’s fine to go ahead and skip to step 2 below to start learning how to use a GoPro for snorkeling.
But, if you don’t yet have a GoPro or something similar, you first need to pick which action camera you want to use. GoPro is kind of the gold standard when it comes to action cameras and pretty much created the genre years back, but you might be surprised to learn that there are now also a lot of other competitors with their own action cameras, all trying to one-up each other.
I do actually own and use multiple different action cameras, and they all have their own unique features, benefits and trade-offs. I go a little into more detail on this in my review of the best underwater action cameras for snorkeling.
But ultimately, what you’re looking for most in an action camera is something that is reliably waterproof, easy to operate (trying to change settings in the middle of the ocean is too tricky if not), and is one that ultimately just puts out awesome snorkeling photo and video. And, for me, there are two main action cameras that meet these criteria which you should consider depending on your situation.

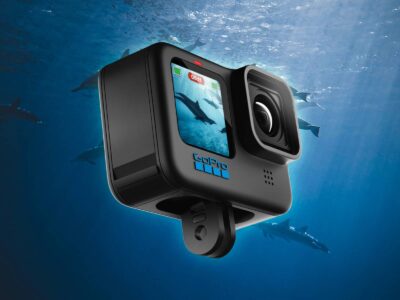
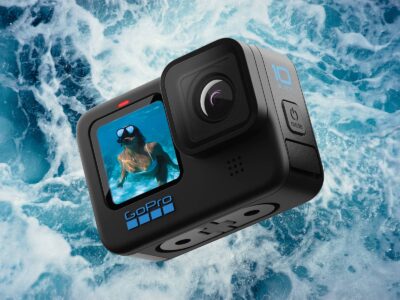
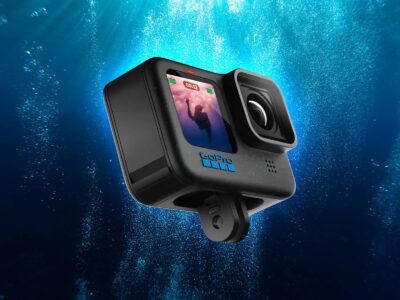
To me, the best action camera that I keep coming back to for most of my underwater expeditions is the GoPro Hero11 Black. Its HyperSmooth 5.0 video stabilization works incredibly well (which is super helpful for something like snorkeling where you’re constantly moving around), the waterproof casing is reliable, and the crispness of the underwater photo and video is awesome (with the right settings, outlined below). And, its straight-out-of-the-lab features of Horizon Lock and Hindsight are actually kind of revolutionary for snorkeling in particular.
(You can learn more over at our full reveiw of the GoPro Hero11 Black for snorkeling and scuba diving.)
You’ll find the GoPro Hero11 Black on Amazon for $399-499 (depending on seasonal pricing), which is actually pretty incredible given all that you can do with the action camera (professional set-ups that do similar things easily cost into the thousands). But, it’s still a bit of an investment to get what’s generally considered to be the best waterproof action camera out there.
If you aren’t sure about committing to the higher-end GoPro, you could also pick up a GoPro Hero10 Black on Amazon for about $349-449 which is $50-100 less than the Hero11 Black, so that’s helpful. Though one version older, the Hero10 Black is still a fantastic waterproof camera with HyperSmooth 4.0 that will pull some really great video and photos for you along with earlier versions of Hindsight and Horizon Lock that have been so huge for GoPro snorkeling.
If you’re curious what kind of budget options might be available, the GoPro Hero9 Black (Amazon listing) is a very capable alternative that comes in at a much lower price (~$299). It has reliable waterproofing, HyperSmooth 3.0 video stabilization, and nice photo and video that gives the Hero10 Black a good run for the money, so it’s a solid option if you’re looking for something a little lower priced.
You’ll also need to make sure that you get the right type of memory card meant for high-resolution photo and video so you don’t mess up any of your footage. We won’t go into that here, but just make sure to also check out the list of the best accessories for snorkeling with a GoPro before buying one.
For the sake of this article, we’re going to choose the Hero10 Black as our example action camera to continue on and learn how to use a GoPro for snorkeling.
(Again, for more on how the GoPro Hero11 Black works with snorkeling in particular, check out Is the GoPro HERO11 Black Good for Snorkeling & Scuba? How The New Version Stacks Up.)
2. Get a Floating Hand Grip
There are a lot of cool accessories for GoPros out there, but there’s only one that we’d consider an absolute necessity for snorkeling: a floating hand grip.
For one, while it’s possible to find a snorkel mask that has a mount on top for your GoPro, mask video always turns out shaky, jerky and often pointed the wrong way. It just doesn’t look good.

But, more importantly, if you’re using your GoPro without a floating hand grip and you happen to bobble it and lose your grasp on the GoPro, more than likely it’s going to sink the bottom of the ocean and never be seen again. That means you’re out ~$499 and also all of the memories which you have saved on that memory card. So, just get a floating hand grip before you get in the water to snorkel with a GoPro. The hand grips really aren’t very expensive.
I swear by the CamKix Waterproof Telescopic Floating Hand Grip (Amazon listing) and have used it for years for GoPro snorkeling. It’s my go-to hand grip because it can easily float with my GoPro attached should it ever need to, the telescoping feature is really useful, and I can even store extra cash, rings, etc. in the hand grip itself and take it with me into the water. It works well and has accompanied me on tons of snorkel trips.
3. Ready Your GoPro Snorkeling Settings
There are definitely basic settings that you want to understand and change on your camera to get the best results when snorkeling with a GoPro. And, it’s a lot easier to prep these beforehand on land than it is in the water, so let’s take care of it now.
(Also, most any action camera is going to have the same types of settings, so these concepts should apply across cameras, even if you don’t have a GoPro.)
Resolution
The resolution that your GoPro shoots at has to do with how big the image or video is that it saves. Higher-resolution photo or video is bigger which makes it look clearer and crisper on a variety of screens, but it also takes up more room on your memory card and needs more computer power to process later.
For most people, 2.7K is our recommended resolution level for video. Anything less is just not going to look that great, and 4K and 5K takes up a a lot more memory card space and can be intensive to process later if you don’t have a better phone or computer.
However, if you do have a larger high-speed memory card (256gb, at least) and a more powerful computer — something like a MacBook Pro (Amazon listing) or a higher-end PC laptop like a Dell XPS 15 (Amazon listing) — then definitely go for 4K at least! It’s going to look better, and if you have the tools to do the heavy lifting it needs, you’ll be happy that you did.
For photos, just go ahead and pick the highest resolution possible. The difference in memory card space and computer power needed for the various resolutions of photos is negligible when compared to video, so you might as well get every bit of resolution out of those photos that you can.
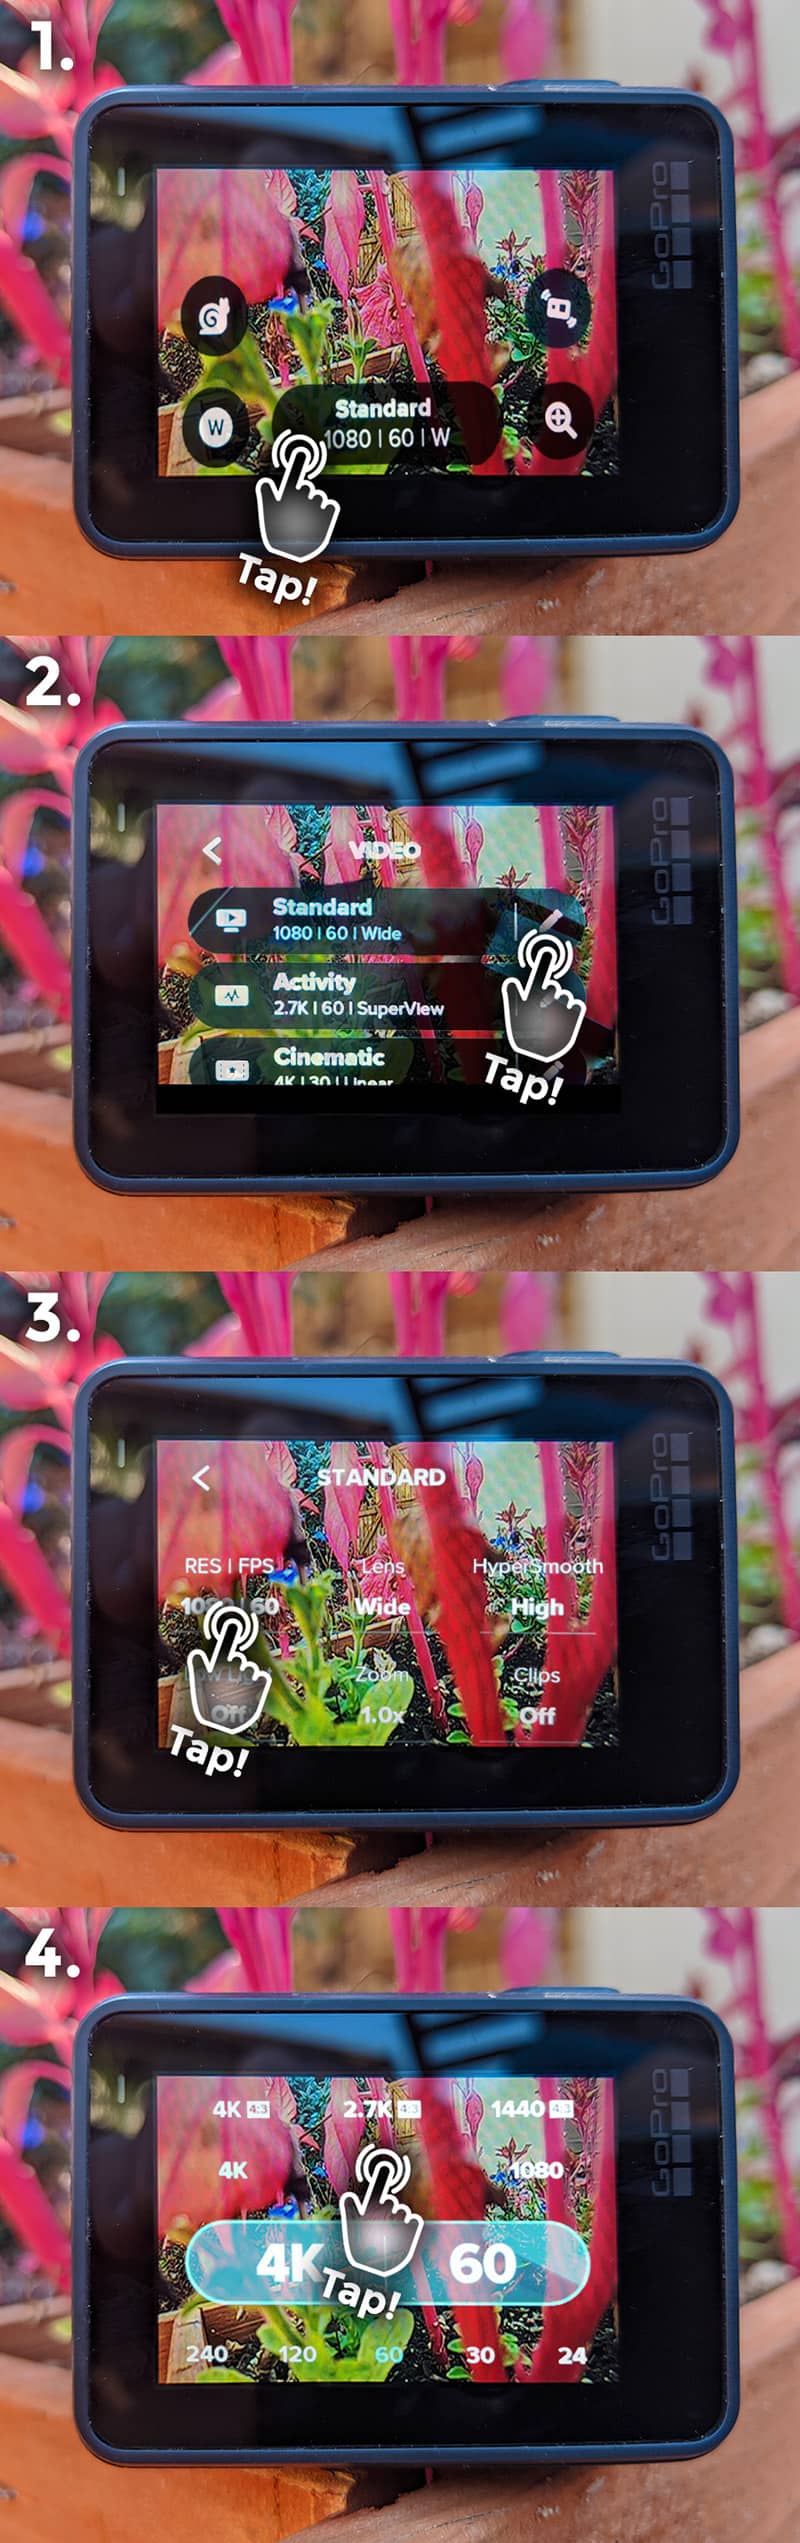
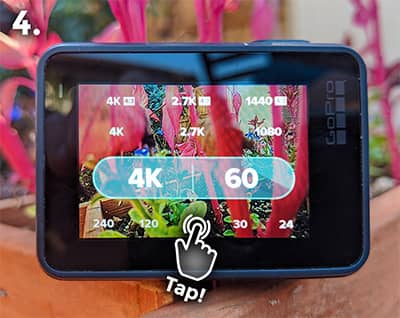
To change your resolution for whatever mode you’re in (photo, video, etc.), tap the settings bubble at the bottom-center of your GoPro touchscreen display (it probably has a lot of odd letters and numbers in it like “Standard 2.7K | 30 | W”), then tap the pencil icon next to the top row of settings (again, something like “Standard 2.7K | 30 | Wide”), tap the “RES | FPS” box, then pick your resolution (4K, 2.7K, etc.) from the top row.
(As an aside, GoPro has also added some presets to the settings screen like “Activity”, “Cinematic”, “Slo-Mo”, etc. that you can play with to see how they affect your various settings.)
Frame Rate
The frame rate setting refers to the number of times each second that your GoPro captures what’s in front of it to make up the eventual video. A higher frame rate means more captures per second, and a lower frame rate means fewer captures.
There are essentially two groups of frame rates: those for slo-mo video (60fps and above) and those not for slo-mo video (usually 24 and 30fps), and you generally want to know before you get in the water and start up your camera if you’re hoping to have the ability to turn what you shoot into a slo-mo video later.
The reason for this is that with slo-mo frame rates (60fps+), you can turn the video into both a normal speed or slo-mo clip, but non-slo-mo frame rates (24 and 30fps) can really only be used for normal-speed clips without them looking shoddy.
If you think that you might at all want to have slow motion clips later, shoot in 60fps. You will need a decent-sized memory card since this will take up at least twice the amount of space as a normal frame rate, but it’s worth it if you have the space. Anything above 60fps (120fps, etc.) is overkill for snorkeling and only meant for really, really, fast subjects.
If you are content with normal-speed video, you typically have a choice between 30fps and 24fps. 30fps will look more like “real life”, while 24fps will have a little bit of a cinematic quality that you can’t quite put your finger on (most Hollywood movies are shot in 24fps). Which looks best for snorkeling is a bit in the eye of the beholder, so experiment with both and see what you prefer.
To change your frame rate when you’re in video mode, follow the same steps as to change the resolution above, then at the last step choose a frame rate from the bottom row instead of a resolution from the top row.
Field of View
The next setting we want to look at is the field of view for our GoPro, which is kind of like how wide the camera is going to open its eye to take in photos and video. The wider the eye opens, the more it sees around it.

That might make it sound like you should set your field of view to the widest value possible to make sure that the camera sees as much as possible. That isn’t always the case, though — especially when it comes to snorkeling — because a super-wide photo or video might make that fish you were filming look super tiny with oh so much water around it. You also don’t want too narrow of a field of view because it might make it tough to keep a moving fish, etc. in frame.
So, I would forget the widest (SuperView) and narrowest (Narrow) field of view settings for the purposes of snorkeling, and instead focus on either Linear or Wide.
Wide view is going to be best if you’re in relatively shallow waters where there isn’t much distance between you and what you’re filming, or if you’re swimming near large subjects (whale sharks, anyone?) Linear, on the other hand, is going to be your best bet for medium to deeper waters, smaller objects (like fish, turtles, etc.) or when you’re farther away from your subject.
To change your field of view, tap the settings bubble at the bottom-center of your GoPro touchscreen display (it probably has a lot of odd letters and numbers in it like “Standard 2.7K | 60 | W”), then tap the pencil icon next to the top row of settings (again, something like “Standard 2.7K | 60 | Wide”), then tap the Lens box and pick your field of view setting (Linear, Wide, etc.)
HyperSmooth
One of GoPro’s coolest pieces of technology that it’s developed as action cameras have progressed has been its video stabilization, recently culminating into something that they call “HyperSmooth”. It works amazingly well, and it really does warrant being called “HyperSmooth”.

It might not feel like you’re moving a lot when snorkeling (even when just floating), but trust me, you are. A lot. And, its really apparent when you load your videos onto your computer later and have to sort through a boatload of shaky footage if you didn’t use video stabilization.
So, I would recommend that you always start with HyperSmooth because it really can make a huge difference in not feeling seasick when you watch your clips later.
To enable HyperSmooth, tap the settings bubble at the bottom-center of your GoPro touchscreen display (it probably has a lot of odd letters and numbers in it like “Standard 4K | 24 | W”), then tap the pencil icon next to the top row of settings (again, something like “Standard 4K | 24 | Wide”), then tap the HyperSmooth box and pick your setting.
Your options for HyperSmooth will typically be either Off, On, High or Boost (if you’re pushing the envelope and shooting in something like 4K/60fps, though, you might not have all of the options available). For snorkeling purposes, just “On” should work fine, with “High” being a decent option if you’re in rowdier waters.
4. How to Use a GoPro for Snorkeling

Actually putting into practice how to use a GoPro for snorkeling is pretty straightforward at its core. Just get in the water and film what you see.
But, there are definitely some tips that I’ve picked up along the way which will help you to do it better and ultimately get better underwater photo and video when you bring your GoPro snorkeling:
- First, make sure that you get well acquainted with the top button on your GoPro (the one that has a red circle on it). This is the shortcut button that launches into whatever mode you had last set (e.g., video) and begins recording, even if the GoPro is off when you press it. This button is hugely helpful for snorkeling because it means that you don’t have to worry about trying to get the GoPro turned on, in the right video setting, and then recording while you’re in the water (then remember to turn it off when you’re done to save battery). Instead, just press it once to turn the GoPro on and start recording, then press it again to stop and turn the GoPro off until you’re ready to record again.
- Relatedly, unless you’re in a spot that’s absolutely teeming with life (those are fun, yeah?), you probably don’t want to film every second of your dive. It fills up the memory card and drains your battery. Just use that top button to turn on and off your recording when you see something worth filming.
- Next, everything recorded by the GoPro is going to look farther away on video or in a photo than it does to your eye, especially if you’re using the Wide lens setting. That means that you’ll need to get closer to something — only if possible to do safely — than you might initially think to get a really good shot.
-

Do your best to get your GoPro snorkeling settings ready on land first since the touchscreen won’t sense your fingers underwater. Also, it’s hugely helpful to get all of your settings where you want them to be (frame rate, resolution, video/photo, etc.) at least on the boat and before you get in the water since it’s a pain to try to do it while actually snorkeling with a GoPro. If you do find a reason that you need to change a setting while snorkeling (it happens), you’ll need to tread water for a moment and lift your hands above the waterline to mess with the touchscreen; the touchscreen won’t recognize your fingers underwater.
- Then, I recommend pretty much always shooting video (instead taking photos) unless you have a specific purpose in mind for photo mode. You end up being able to capture a lot more of the experience, and GoPro’s computer and phone software makes it really easy to pull frames from your videos and turn them into photos, which works great for Instagram, etc.
- Lastly, if you end up wanting to use your GoPro just above waterline for any reason, but are finding that the residual water left on the lens is distorting your photos, try spitting on the lens and rubbing it around a little with your finger before rinsing it off and trying again. It sounds a little gross, but the natural oils in your saliva work really well to repel water from the GoPro lens.

GoPro also has an entire YouTube channel dedicated to various tutorials on what to do with your camera, what to do with your footage after you’ve captured it, and plenty more. It’s worth a look after you get comfortable with the tips here.
5. Clean Your GoPro After Snorkeling
Salt from the ocean breaks down anything over time, including your GoPro. So, it’s critically important to clean it after each time you snorkel with it.
Fortunately, it’s super easy. Just run it under some fresh water for 10-20 seconds and give it a once-over with your fingers while rinsing to help push any salt off of your action camera. If you do wipe it dry with a towel, just make sure that it’s nothing abrasive that might scuff the camera lens. That’s it!
Bonus: Awesome GoPro Accessories for Snorkeling
You can find literally thousands of GoPro accessories out there for all sorts of weird purposes. But, there are two that we think are awesome enough to consider picking up to mention here.
First, have you ever seen those sweet ocean shots from someone where half of the photo is underwater and the other half is above water? Usually you need a big DSLR camera with a wide-angle lens and waterproof housing to do something like that, but it’s actually also possible with a GoPro if you have a photo dome.
My favorite GoPro photo dome for casual snorkelers is the TELESIN GoPro Dome Port (Amazon listing). Since it’s well made and just ultimately helps you take some really cool photos, it’s a really solid bang for your buck. And, it integrates a floating hand grip so I don’t worry about fumbling my GoPro into the ocean’s depths.
The one complaint that I sometimes hear about the TELESIN GoPro Dome Port is that some people have trouble with it fogging up on them. But, I find that if you clean and defog the dome in the same way that I recommend cleaning and defogging snorkel masks over at How to Clean a Snorkel Mask & Easily Prevent Fog and Damage (and also don’t let it sit in the sun before you get in the water), you’ll avoid fog just about every time.

Second, as you get into GoPro snorkeling, you might find that a lot of your photos and videos can start looking a bit too blue or even green, especially if you’re diving down a bit. The reason behind that is the physics of how blue light works at various depths of water, but it can actually be counteracted with a red light filter for your GoPro.
If you really want to take your snorkel shots to another level and make sure that all of the fish, coral, turtles, etc. that you’re coming across look a lot more true to life (and not just like a mass of muddied blue colors), check out the PolarPro GoPro Dive Filters (Amazon listing), a really solid and inexpensive set of red light filters that you just pop onto the original GoPro protective housing (Amazon) depending on if you’re in blue water, green-ish water, or shallow water, and head out snorkeling. Red filters make such a big difference with your GoPro footage that I wrote a whole guide on using the best GoPro red filters for snorkeling and scuba diving.
(You can also learn more about really useful additions to your GoPro by reading The Best GoPro Accessories for Snorkeling: 5 I Can’t Do Without.)
The Deep Dive
I personally can’t imagine ever snorkeling without my GoPro. My action cameras have allowed me to share so many of my experiences with friends and family, not to mention capture memories that I otherwise wouldn’t have been able to which I can then hold onto for a lifetime myself.
Learning how to use a GoPro for snorkeling isn’t very hard, and if you follow the above tips you’ll be well on your way to capturing your memories in much better quality and with way fewer problems than with just sticking to the default settings before jumping in.
Up Next
There’s much more to learn about using a GoPro for snorkeling and doing it at a high level, so check out some of our other helpful GoPro snorkeling guides below: